

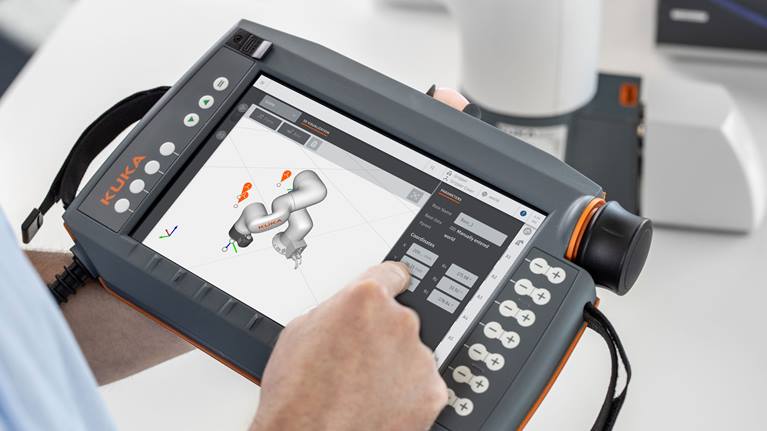
A KUKA smartPAD black screen can come from a display fault, a missing supply, a connection problem or an incomplete startup. Replacing the panel first can miss the cause. Record what the pendant and controller do from power-on, then separate a dark image from a terminal that never reaches its normal operating screen.
This guide addresses KUKA teach pendant black-screen and startup diagnosis. It focuses on observations, compatible test boundaries and repair acceptance. It is not a universal recovery sequence. KUKA lists smartPAD for KSS or Sunrise.OS and smartPAD pro for iiQKA.OS2. Use the label and installed system details to identify which instructions apply.
1. Identify the pendant generation before testing
Photograph the pendant, controller and cable labels. Record the installed control software, any recent maintenance and any screen replacement. A search for KUKA smartPAD2 or KUKA KCP can return different equipment generations. Those names do not establish compatibility with the installed terminal. Keep the full assembly number and approved replacement list with the service record.
Before a restart, preserve visible messages and available controller logs. Note whether the problem followed a power event, impact, liquid exposure or software change. Repeated power cycling can obscure the first event. Follow the specified shutdown and isolation procedure before disconnecting the pendant, opening the housing or inspecting cable connections.
2. Record the exact startup stage
| Screen observation | Comparison to make | Avoid this conclusion |
|---|---|---|
| Dark from the start | Controller state and permitted supply checks | The LCD is definitely broken |
| Logo appears, then screen goes dark | Startup sequence and available logs | There is no power at all |
| Backlight visible but no image | Image path, panel connection and startup state | The backlight is the failed part |
| Normal screen appears, then connection is lost | Cable, interface and controller events | Every dropout is a screen fault |
Capture a short video from an approved start if possible. Include the order of visible changes rather than only the final black frame. A logo proves that some display operation occurred at that moment; it does not prove a healthy complete system. A controller that is not ready can also prevent the expected user interface from appearing.
3. Separate image, backlight and terminal power
Observe under suitable lighting without forcing the display or using a tool against the surface. A faint image may support a backlight-related investigation, but its absence is inconclusive. Check whether any permitted keys or status indicators respond. Interpret these observations with the controller state; a glowing screen alone cannot prove that the application has started.
Internal electrical checks require the correct drawing, identified test points and suitable equipment. Record the rail or signal actually measured and its specified limit. There is no safe universal pinout or supply value for every smartPAD generation. A supply measurement at the controller does not establish that the same supply reaches the terminal under the relevant test condition.
4. Check the cable path and approved comparison hardware
With the equipment isolated as required, inspect the lead, terminal entry and controller-side connector. Record crushed sections, loose locks, contaminated contacts and damage at strain relief points. Check both sides of a mating connection when permitted. A replacement pendant will not correct a damaged cabinet socket or the routing that caused repeated cable strain.
Where the manufacturer procedure allows it, use a known-good compatible assembly to change one variable. Record software context and part identity for both combinations. Keep a cable swap separate from a terminal swap. A normal boot with the replacement supports isolation, but further tests are needed to name the failed internal part or validate the complete safety functions.
5. Inspect the display path only after the evidence points there
For a terminal-local fault, qualified personnel can inspect display flex routing, connector retention, liquid traces and physical damage under controlled bench conditions. Preserve photos before cleaning or repair. A lifted latch, torn flex or damaged panel must be tied to the actual failure. Do not repair an unfamiliar connector by guessing its pin functions or bridging damaged contacts.
If a display module is justified, verify the complete approved part and revision before fitting it. Inspect the housing, seals and cable restraint during assembly. A successful open-housing image test is not the same as an assembled terminal test. Cover pressure, trapped wiring or a loose connection may appear only after the terminal is put back together.
6. Separate software recovery from hardware repair
A startup hang after a software change needs its own evidence path. Save the version, change history and exact startup stage. Follow the matching manufacturer recovery procedure, including backup requirements. Do not load an image from another controller or pendant because it has a similar model name. A factory reset can remove useful settings without fixing a display or cable fault.
7. Verify startup, image quality and the installed system
Record the agreed startup tests, screen quality, touch response, keys and communication state using the approved setup. Include an observed restart fault only where the test procedure can reproduce it. State the actual conditions and results, without inventing a standard burn-in duration. A bench test with limited functions must be described with those limits.
Before return to robot service, qualified personnel must complete the specified emergency-stop, enabling-device and cell-level checks. Never bypass a safety input to make the terminal appear ready. For an enquiry, send labels, startup video, full messages and cable details. These let the repair team distinguish a display assessment from cable, controller or recovery work.
General teach pendant fault diagnosis
Teach pendant repair assessment
Manufacturer reference: KUKA smartPAD families and operating systems