

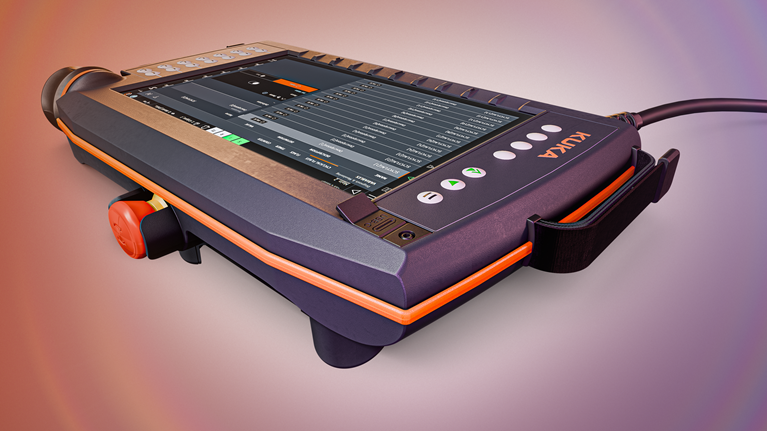
A teach pendant with a dark screen, failed touch input or a lost connection needs a clear fault record before repair. Separate the display, keys, cable and controller response. One failed function does not prove that the whole terminal is defective. Start with the exact pendant and controller labels, then follow the symptom that you can reproduce.
This guide explains how to assess an industrial robot teach pendant. It covers evidence, possible damaged parts and return-to-service checks. The same device may be called a teaching pendant. These names describe a function, not interchangeable hardware. Use the installed equipment manual for wiring, approved parts and test limits.
What does a teach pendant do?
A pendant provides a local view of robot status, alarms and program steps. Depending on the system, it also provides jog keys, a touchscreen, mode controls and an enabling device. The controller decides how these inputs affect the robot. Teach pendants from different generations can look alike while using different interfaces or software.
Manufacturer product pages help identify the device family. For example, KUKA lists smartPAD pro for iiQKA.OS2 and smartPAD for KSS or Sunrise.OS. That distinction does not establish compatibility with your controller. Compare the complete part number, revision, connector and installed software before selecting a spare.
Teach pendant repair service and assessment
Record the fault before opening the terminal
Photograph both labels, the full alarm text and the cable ends. Record whether the problem starts at power-up, after warm-up or during a specific action. Note recent drops, liquid exposure and previous repairs. State which functions still work. Preserve logs and approved backups before any reset or software change.
Use a simple intake record: device number, controller, software version, first symptom, operating state and last change. Separate facts from guesses. “Screen dark; controller powered; status light observed” is useful. “Main board broken” is a diagnosis that still needs evidence.
Dark screen: separate display faults from startup faults
| Observation | Check next | Do not assume |
|---|---|---|
| No display and no normal status | Documented supply path, cable and controller state | The LCD alone has failed |
| Faint image under suitable inspection | Backlight circuit and its supply, where fitted | The touch layer needs replacement |
| Lines, flicker or partial image | Display connection, panel and related circuit | A new screen will fix every fault |
| Logo repeats or startup stalls | Event log, power stability and software state | Firmware must be reinstalled |
A repair technician can inspect the panel, display flex cable, connector latch and backlight supply after isolation and verified discharge. A cracked LCD, torn flex or corroded contact needs a matching replacement or a documented repair. Check the circuit that feeds the damaged part. A lit display alone does not prove stable operation.
Touchscreen or keypad fault: identify the failed input
First distinguish no touch response, position offset and a dead area. Clean the surface only by the approved method. Remove an unsuitable overlay only if the equipment instructions allow it. Use a documented touch test or calibration when available. Calibration may correct alignment; it will not repair cracked glass, a torn flex or liquid damage.
If one key fails but nearby keys respond, inspect the key mechanism, membrane, connector and input path. If several keys fail together, check shared connections before replacing each key. A jog command may also be blocked by operating mode or controller state. Record the terminal input separately from permission to move.
Cable and communication faults: isolate the affected path
For a connection error, save the full message and timing. Confirm the cable and connector numbers. Inspect the strain relief, jacket, locking parts and contacts after shutdown by the prescribed procedure. Do not flex a damaged cable while the robot is operating. Note any earlier link between cable position and the fault.
Continuity testing needs the cable isolated at the required ends and the correct pin assignment. A basic continuity result does not prove data-link quality, shielding or reliable operation under load. Never apply an insulation tester across connected terminal electronics. Use the manufacturer test method and limits for the cable assembly.
An approved, known-good assembly can help isolate the fault when the service procedure permits substitution. Change one item at a time and record the result. A matching plug is not proof of compatibility. Replacing a pendant, cable and controller together removes the evidence needed to identify the failed part.
Repair the confirmed damage and its cause
Teach pendant repair may involve a display module, touch layer, keypad membrane, cable assembly or board-level connection. The inspection must connect the proposed work to the observed fault. Replace damaged seals and housings as specified. Do not claim the original protection rating after repair without the required evidence.
Check why the damage occurred. A failed cable near the handle may relate to routing or repeated strain. Liquid damage needs inspection beyond the visible stain. Board work needs ESD controls, suitable rework equipment and an inspection record. Blanket reflow or an unverified screen swap can conceal the real cause.
Verify the terminal before returning the robot to service
Before power-up, check assembly, connector seating, cable retention and the specified unpowered results. Then use an approved fixture or compatible controller for controlled tests. Record display quality, touch accuracy, key response, startup sequence and communication. Include the original fault conditions where the agreed test setup can reproduce them.
Safety-related functions require a separate check by qualified personnel under the machine procedure. Do not bridge emergency-stop or enabling-device circuits. A bench display test does not validate the complete cell. List the tests completed, their conditions and any checks still required after installation. Avoid universal burn-in times or unsupported pass limits.
Questions to settle before sending a teach pendant for repair
Can a black screen be fixed by replacing the LCD? Sometimes, but first separate panel damage from missing power, a backlight fault or failed startup. Can a pendant from the same brand be used as a spare? Only after its full compatibility is confirmed. Do not choose by brand or screen size alone.
What should be sent with an enquiry? Provide both labels, the complete alarm, symptom photos and any cable identification. State whether the cable can accompany the terminal. Ask which bench tests are included and which machine checks remain. Cost, lead time and repair scope depend on that evidence and the actual damage.
ABB painting robot teach pendant symptoms
Industrial PCB testing and repair decisions
Manufacturer reference: KUKA smartPAD product families
Manufacturer reference: FANUC Lightweight Teach Pendant
Brand-specific fault guides
ABB FlexPendant Touchscreen Not Working: Diagnosis and Repair